Wednesday, 15 February 2017

PIXSCAN CALIBRATION PART 1 OF 2

I'm sure a lot of you have heard about the Pixscan mat & asked yourself, how do I use it or are basically to scared to attempt it.  Well let me put your mind at ease, it's not difficult and just takes a few minutes to set up.  Once you have done the calibration you are set to open a whole new world with your Silhouette.

The reason I love the Pixscan mat so much is that all that fussy cutting becomes a thing of the past, now isn't that worth it?

So lets get started...

Step 1:

Open your Silhouette software and click on the 3rd icon on the top left hand side as seen in the image below.  If you hold your cursor over the icon it will read "Open Pixscan image".  

On the right hand side you will see the "PIXSCAN" window opens up.


Step 2:

a)  Click on the down arrow "IMPORT FROM FILE"
b)  Click on "CAMERA CALIBRATION"
c)  Click on A4 using the down arrow and then click on the "SHOW CALIBRATION TEST CARD"

You will now see this dotted paper appear as per the image below.

d)  You need to print this on your printer


Step 3:

You now need to take a photo of the printed image using the images below as a guide.

If I can give you a few tips:
1)  Take the photo in a well lit area but don't have any shadows over the page when you taking the photo.
2)  Make sure your camera lense on your cell phone is clean.
3)  Go close to the image and try line up the sides of your cell phone screen with the dotted lines and take the photo as straight on as possible without shaking
4)  Don't have any background area showing

It's sounds like a lot of trouble for just one picture, but believe me it's all worth it.
The image below is a good example of a photo...now we are almost ready to play

Once you have take the photo (I tend to take a few just in case), connect your cell phone to your PC using your USB Cell phone charging cable and transfer the photos you have just take to your desktop (or save it somewhere that is easly found as you need it in the next step), alternatively email to yourself and download those photos onto your computer.


Now go to your Silhouette software and click on the "+" sign as circled in red below and that opens up a pop up screen whereby you can now go and find the picture that you just saved.  i.e: on your desktop or folder that you chose.

Once you have found the picture, click "open" and the Silhouette software will automatically start to Calibrate your cell phone to the software.

If it doesn't like the picture a red screen will open up saying it doesn't like the picture and you must simply try take the photo again or use one of the others that you took.

If it likes it you will see that your cellphone description will show up in the box above the "+" sign.

That's it...that's how easy it is to Calibrate your phone to your Software.

In part 2 of this lesson, we will go into more detail about using your pixscan mat, so be sure to watch out for Part 2 of this lesson.


Pixscan mat available.  On special with this lesson from Liane Van Harn designs
Normal Price R337.45
Now only R290.00 while stock lasts
email Lianevharn@gmail.com
to order yours now.
Proof of payment confirms your order


Wednesday, 8 February 2017

Freebee just for you in time for Valentine's day

Last week I showed you how to trace an image so you can cut it on your Silhouette Machine, so this week I will share a bunch of "Valentines" cut files, I created by tracing various images I found on the internet.


I hope you enjoy creating a masterpiece with these cut files.

Click on the link below to download the FREE files.  Should you battle with the link, copy and paste the link into google.

https://www.dropbox.com/s/j0oxrfa9d089c89/Valentine%20cut%20files.studio3?dl=0


There has been a lot of interest for classes all over South Africa, I have my first roadtrip to Polokwane coming up soon.  We have a few spots open so book TODAY to avoid disappointment:


Then for the Cape Town ladies Snippy Sisters are launching there first workshop soon.

Book directly with them.


Ladies lets support our local talent and teachers.

xoxo
Liane


Wednesday, 1 February 2017

NEW KITS JUST UNPACKED

With NSD last Saturday, I was a busy lady designing kits that were launched.  We have a few left so if you would like to secure yours, please contact Beautiful Scrapbooks asap on 011 425-4817 or ada@beautifulscrapbooks.co.za as stock is limited.
School Snapshots R313.50 (This kit has a pocket for reports or certificates

Family is ... R276.00

Family made with love R235.80


The Beach is my happy place R250.00
xoxo
Liane

Trace and cut for beginners

Ok so you have bought a Silhouette & you are wanting a specific design & you can't find what you are wanting in the Silhouette store OR like me you just want to know how to get the most out of your machine after all that's what it's designed to do right?

Well here are some basic step by step instructions on "HOW TO TRACE"...

First off you Google an image that you are wanting, in this instance I went to google and typed "Valentine png" in the search bar, I then clicked on "IMAGES" but that give you a whole bunch of coloured images which the Silhouette can trace but to start with I always prefer to find black & white line drawings as it is usually alot easier.  So once you have clicked on "IMAGES" then click on tools & then on "TYPE", you will notice a drop down menu opens up, then click on "LINE DRAWING".

You will then end up with the images below.

I chose the 6th picture for this example, being the black heart with the flourishes/swirls in it.  Click on the image and save it.  (If an image has a watermark, it means you need to purchase the image, alternatively look for something else that is free)


Now open the saved image in your Silhouette software & click on the icon on the top right hand side that has a yellow square with a blue butterfly in it.

Now you will see the TRACE window open up on the right hand side as per the image below.  Click on the top line that is hightlighted in blue in the picture that says "SELECT TRACE AREA", now you will move your mouse over the "Heart" image & you will notice the pointer of your mouse is a "+" sign.  
Now starting in the top left hand corner drag & highlight the entire image of the heart until it is covered with a lowlighted square/rectangle, once you are sure you have covered the entire area release the square/rectangle you just dragged over the image. 


Once you release the image it will have this yellow line around the image, but when tracing it is ideal to rather get a complete yellow image of the black area, so on the right hand side where the "TRACE" window is, you will notice that the "HIGH PASS FILTER" is ticked, so in this instance you need to "UNTICK" the High pass filter.

Once you have unticked the High pass filter you will notice that the image changes yellow.  Some areas look a bit rough, and you can try use the "THRESHOLD" slider & adjust that slightly, but in this instance, I am pretty happy just as it is.

Now click on the "TRACE" button that is highlighed on the right hand side.

Once you have clicked on the Trace button you will be left with the heart & a fine red line around the image.  If you now click on the black heart and drag it off into the grey area, you will notice a red trace of the heart being left behind, that is now a cut line and you can go ahead and size it to the size you want & send to the Silhoutte machine to cut it out.

I trust you enjoyed this tutorial on how to trace, until next time have fun.  I would love to see what you have designed so feel free to share it with me.

xoxo
Liane


Wednesday, 25 January 2017

SILHOUETTE NOT CUTTING


Gosh the weeks just fly by, I can't believe it is Wednesday again.

I had a stunning card lesson planned for this week, but have decided to push it out for now as we had a lot of ladies battling with their machines not cutting or tearing the paper ect...

So this week it gives me great pleasure to welcome Melissa Viscount from none other than Silhouette School.  Melissa is a fulltime blogger and has been referred to as a SILHOUETTE GURU time and time again.

I approached Melissa and requested that she allows me to make reference to her lesson why your Silhouette would not be cutting (or not cutting completely) and she graciously accepted.

So without any more delays, here are 11 reasons why you could be having problems with your Silhouette not giving you the desired cut.

11 REASONS YOUR SILHOUETTE IS NOT CUTTING (OR NOT CUTTING COMPLETELY)


Hope this will solve your problems, but if not feel free to message me and I will try my best to help solve your problem.

Thank you once again Melissa for sharing one of your many many amazing lessons.

xoxo
Liane


Saturday, 21 January 2017

JUST A FEW OF MY DOUBLE PAGE KITS AVAILABLE


January has been a busy month for me having released 4 new double page kits:

These kits are available at Beautiful Scrapbooks.

Stock is limited so be sure to secure yours today.

Call 011 425-4817 to order yours or email ada@beautifulscrapbooks.co.za

Today is the day 2 learn something new R235.00

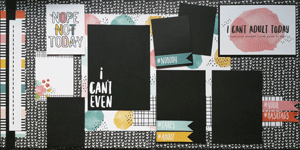
Nope Not today R243.00

Summer loving R338.20

XOXO R282.70

A few other kits that we have limited stock left of :

Coffee & Friend R282.00

Cherish Family Memories R374.50

Get away R217.00

Wednesday, 18 January 2017

PRINT & CUT

Have you seen an image that you just want to print & then cut out without having to pick up scissors & fussy cut...well with the Silhouette Print & Cut feature, you can do just that in a few easy steps:

Step 1:-  

Open up your Silhouette programe & go to the icon along the top right that is highlighted in blue (if you hold your mouse over it a pop up window will open & it will read "Open the design page settings window".

In this window on the right hand side it will say "Automatic Cameo", if you click on the down arrow, a pop up window will open and then find "A4" & select this.

You will now notice that your page size will change to the image below.  You can choose either "Portrait" or "Landscape" by selecting either or as per the highlight blue "Portrait" setting on the right, as in my case below.


Step 2:-

Now go to the icon in the top right hand side that is a "rectangle with 4 black right angles in the corner", if you hold your mouse over it it will tell you "Open the registration marks window"

Once the "Registration marks" window opens up, click on the down arrow by the "Style" which will initially be "OFF", change that to "Type 1, cameo, portrait, curio" if it's one of those machines that you have.

You will now notice that your page will change as per the picture below.  You will notice that on your screen you have a black square in the top left hand side and a right angle black marking in the top right & bottom left.  You will also notice a low lighted grid area that runs along the top and in the bottom left hand corner.  The images that you want to print & cut must not overlap this grid area or the red line line that is shown below otherwise you could end up with your images not cutting correctly.


Step 3:-

Find the images that you would like to cut on your computer or in your library and size them to the size you want.

You will see that I have not gone over the red line or in the grid area.

NOTE:- If your images DON'T have cut lines around them, you will need to trace the images and create cut lines.  I will be covering "Tracing" in a few weeks time, in the mean time you can download the file with trace lines by clicking on the link below.


Step 4:-

Now click on the printer icon in the top left hand corner or go to "File > print" & print your design on the printer that you have linked to your Silhouette Machine.  With my printer I need to make sure that it will print "Borderless" otherwise the "right angle black line" in the bottom left hand corner doesn't print properly and this will cause an issue with your Silhouette machine when it needs to read the registration marks.

 Step 5:-

Now that it has printed, I have stuck the printed sheet to my cutting mat.  You need to make sure that if your software is set to potrait you need to stick it on the mat the same way, otherwise you will end up with errors and it won't cut properly or at all.

Now load the mat into your machine & then send to Silhouette, change your blade settings according to what material you are cutting.

You will notice your machine will read the black square in the top left hand corner as well as the 2 right angles in the top right & bottom left hand corner, only then will it start cutting the files.


 Step 6:- 

Once your machine has finished cutting the files, you can now remove the cut images from your cutting mat using a spatula, being careful not to tear your cut files.


Now you are ready to turn this into a Scrapbooking masterpiece.

The images I used for this sample I found online at:-


To purchase additional files that will match the free images I used click on the link below:- 


Until next week
xoxo
Liane